Configuration
Configuring SSO allows your organization to access Nebula using corporate credentials, eliminating the need to create dedicated user accounts.
Additionally, you can enable group mapping (e.g., Active Directory groups) to Nebula's application roles, allowing for precise permission management for colleagues authorized to access Nebula.
In order to configure the single sign-on on Nebula, you need these data: Discovery Endpoint, Client ID, Client Secret.
If your provider is Microsoft, you can follow this guide.
Nebula Configuration
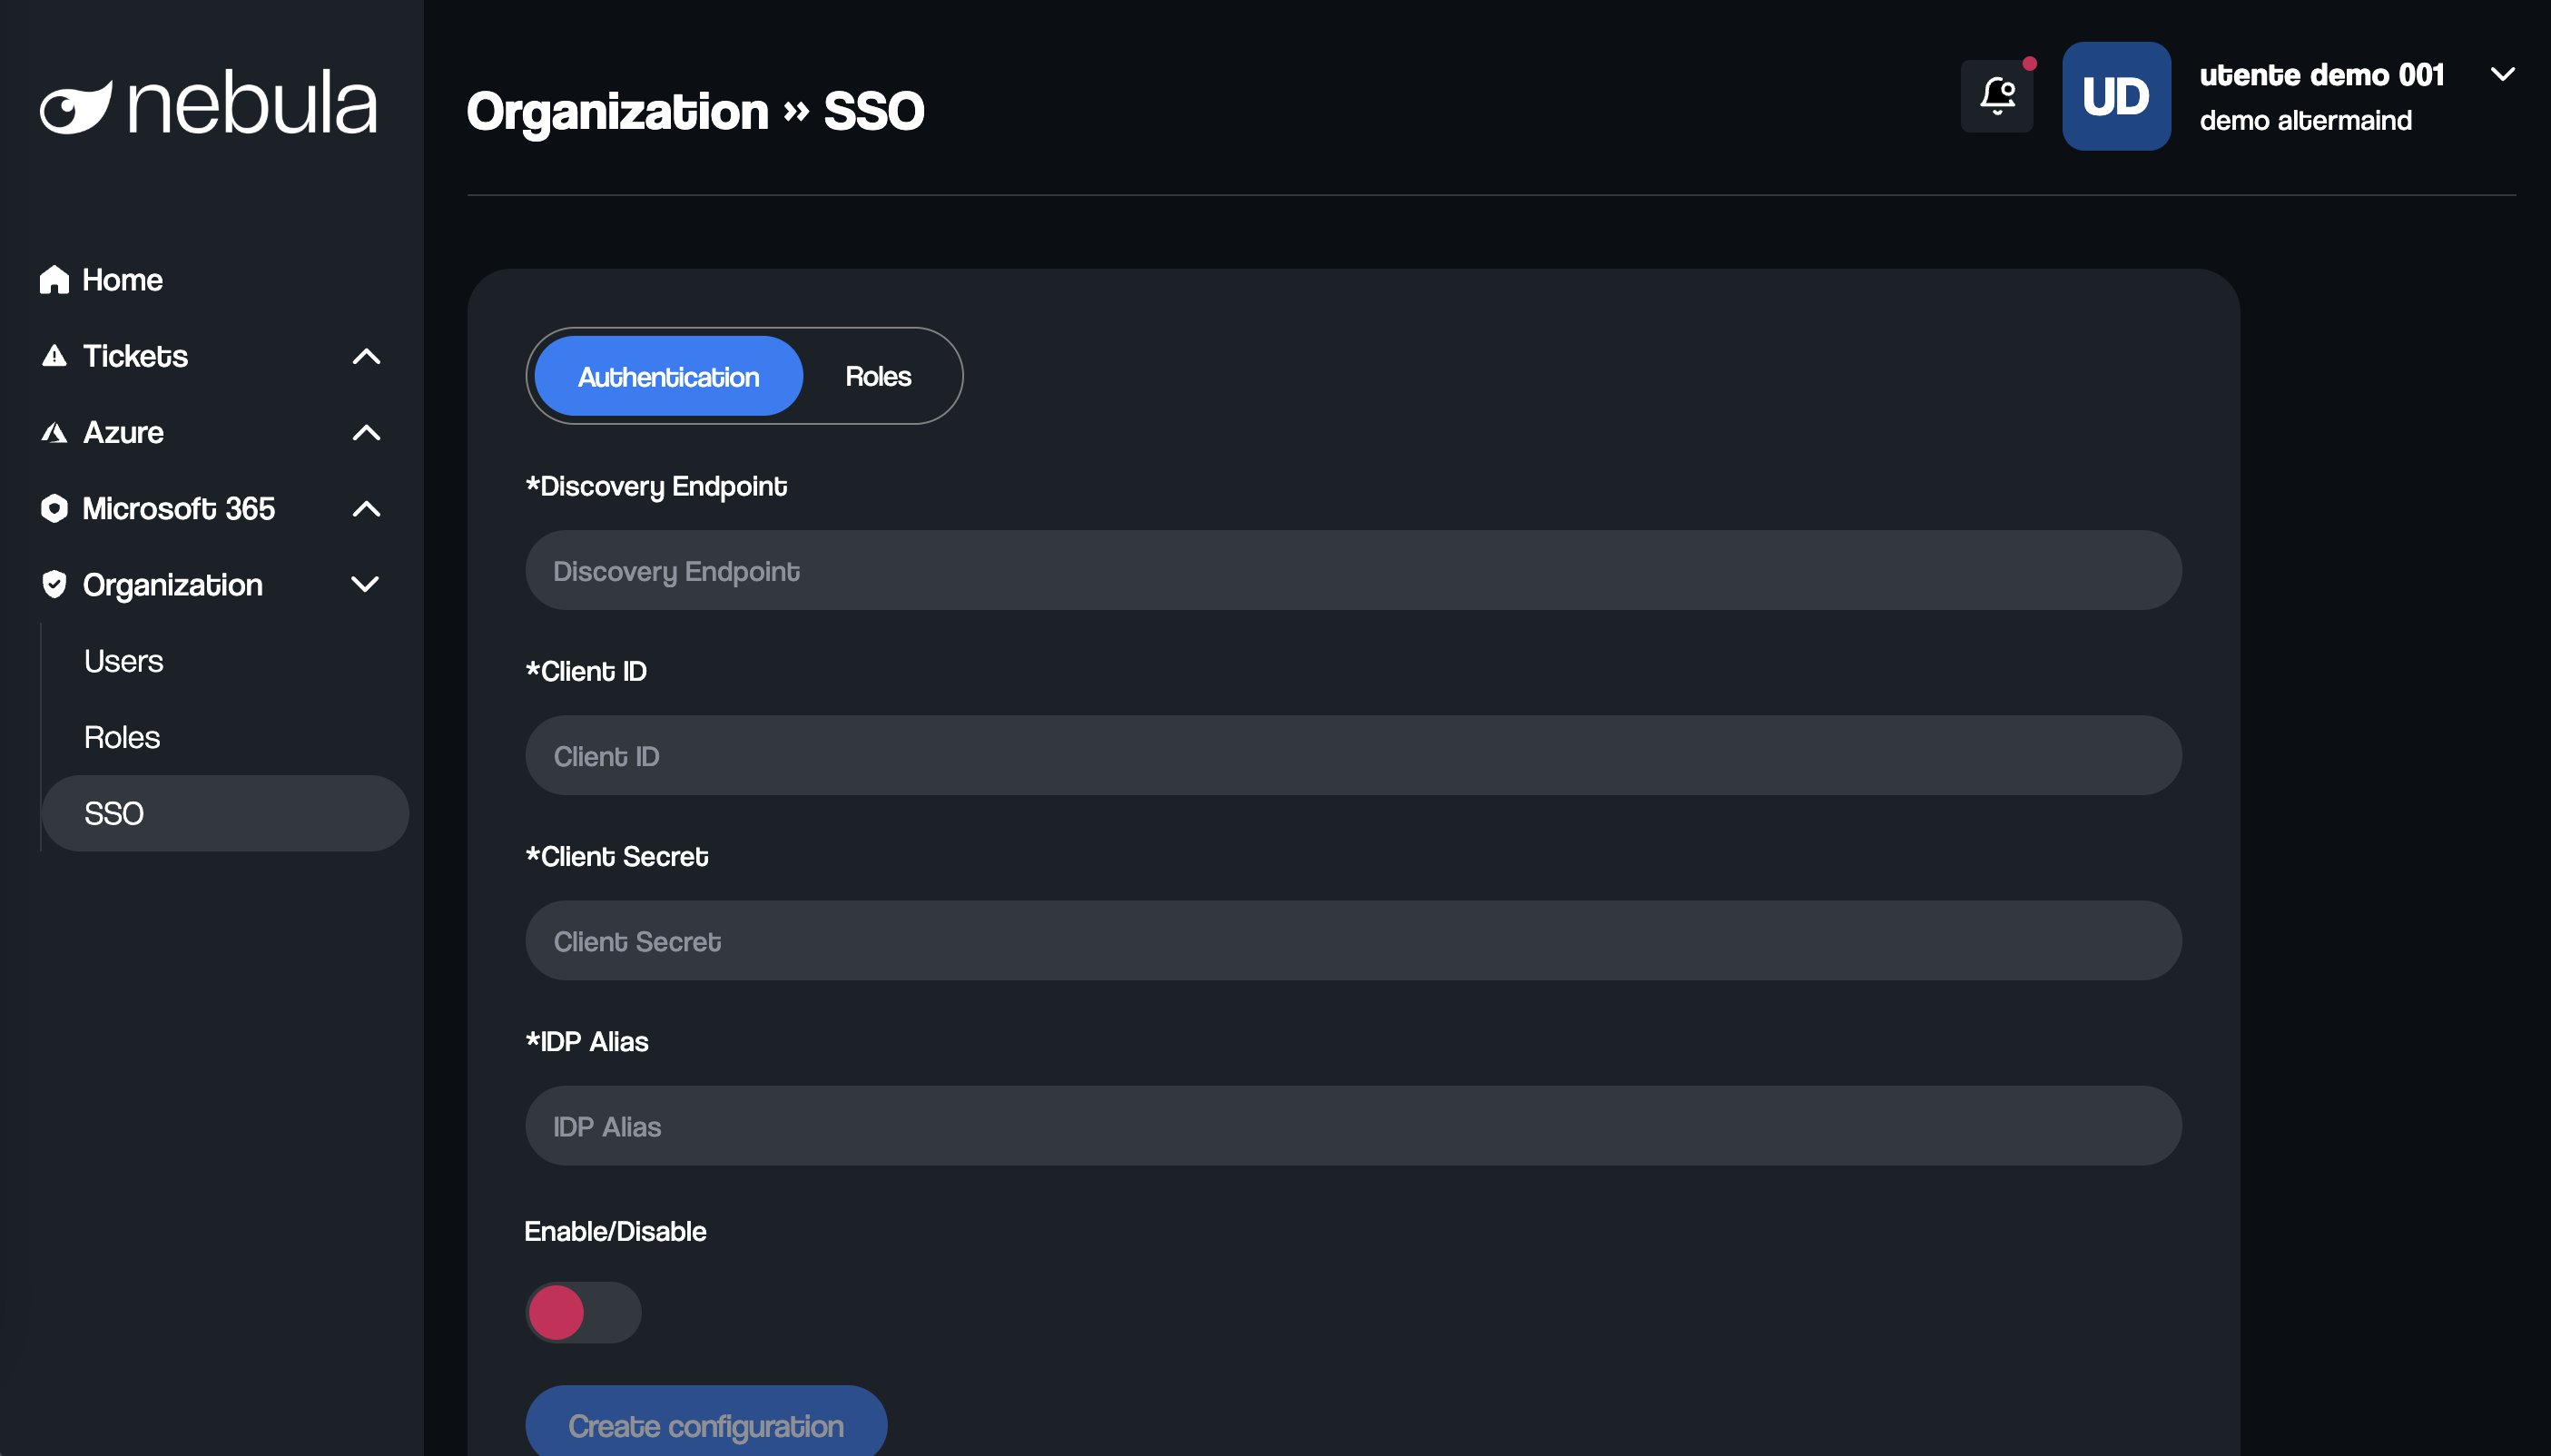
To configure SSO, you need the following four pieces of information:
- Discovery Endpoint: The URL that provides all the necessary configuration details for the identity provider.
- Client ID: The client ID of the app registration.
- Client Secret: The client secret of the app registration.
- Alias: A name used to identify the configuration, which will be included in the SSO login URL.
After Saving the Configuration
Once the configuration is saved, you will receive two key values:
- Redirect URL: This must be set in your app registration to ensure that, after logging in, users are correctly redirected to Nebula.
- Login URL: A unique URL for your organization that should be shared with your colleagues. This is the URL to use for SSO authentication.
Enabling and Disabling SSO
As you may notice, there is a toggle to enable or disable the SSO configuration. This allows you to enter and save all the required parameters without immediately activating SSO, giving you the flexibility to enable it at a later time.
Enable SSO with Microsoft
Follow these steps only if you want to configure the SSO with Microsoft.
Step 1: Sign in to Azure Portal
Go to the Azure Portal.
Sign in with an account that has the necessary permissions to create and manage App Registrations.
Step 2: Create a New App Registration
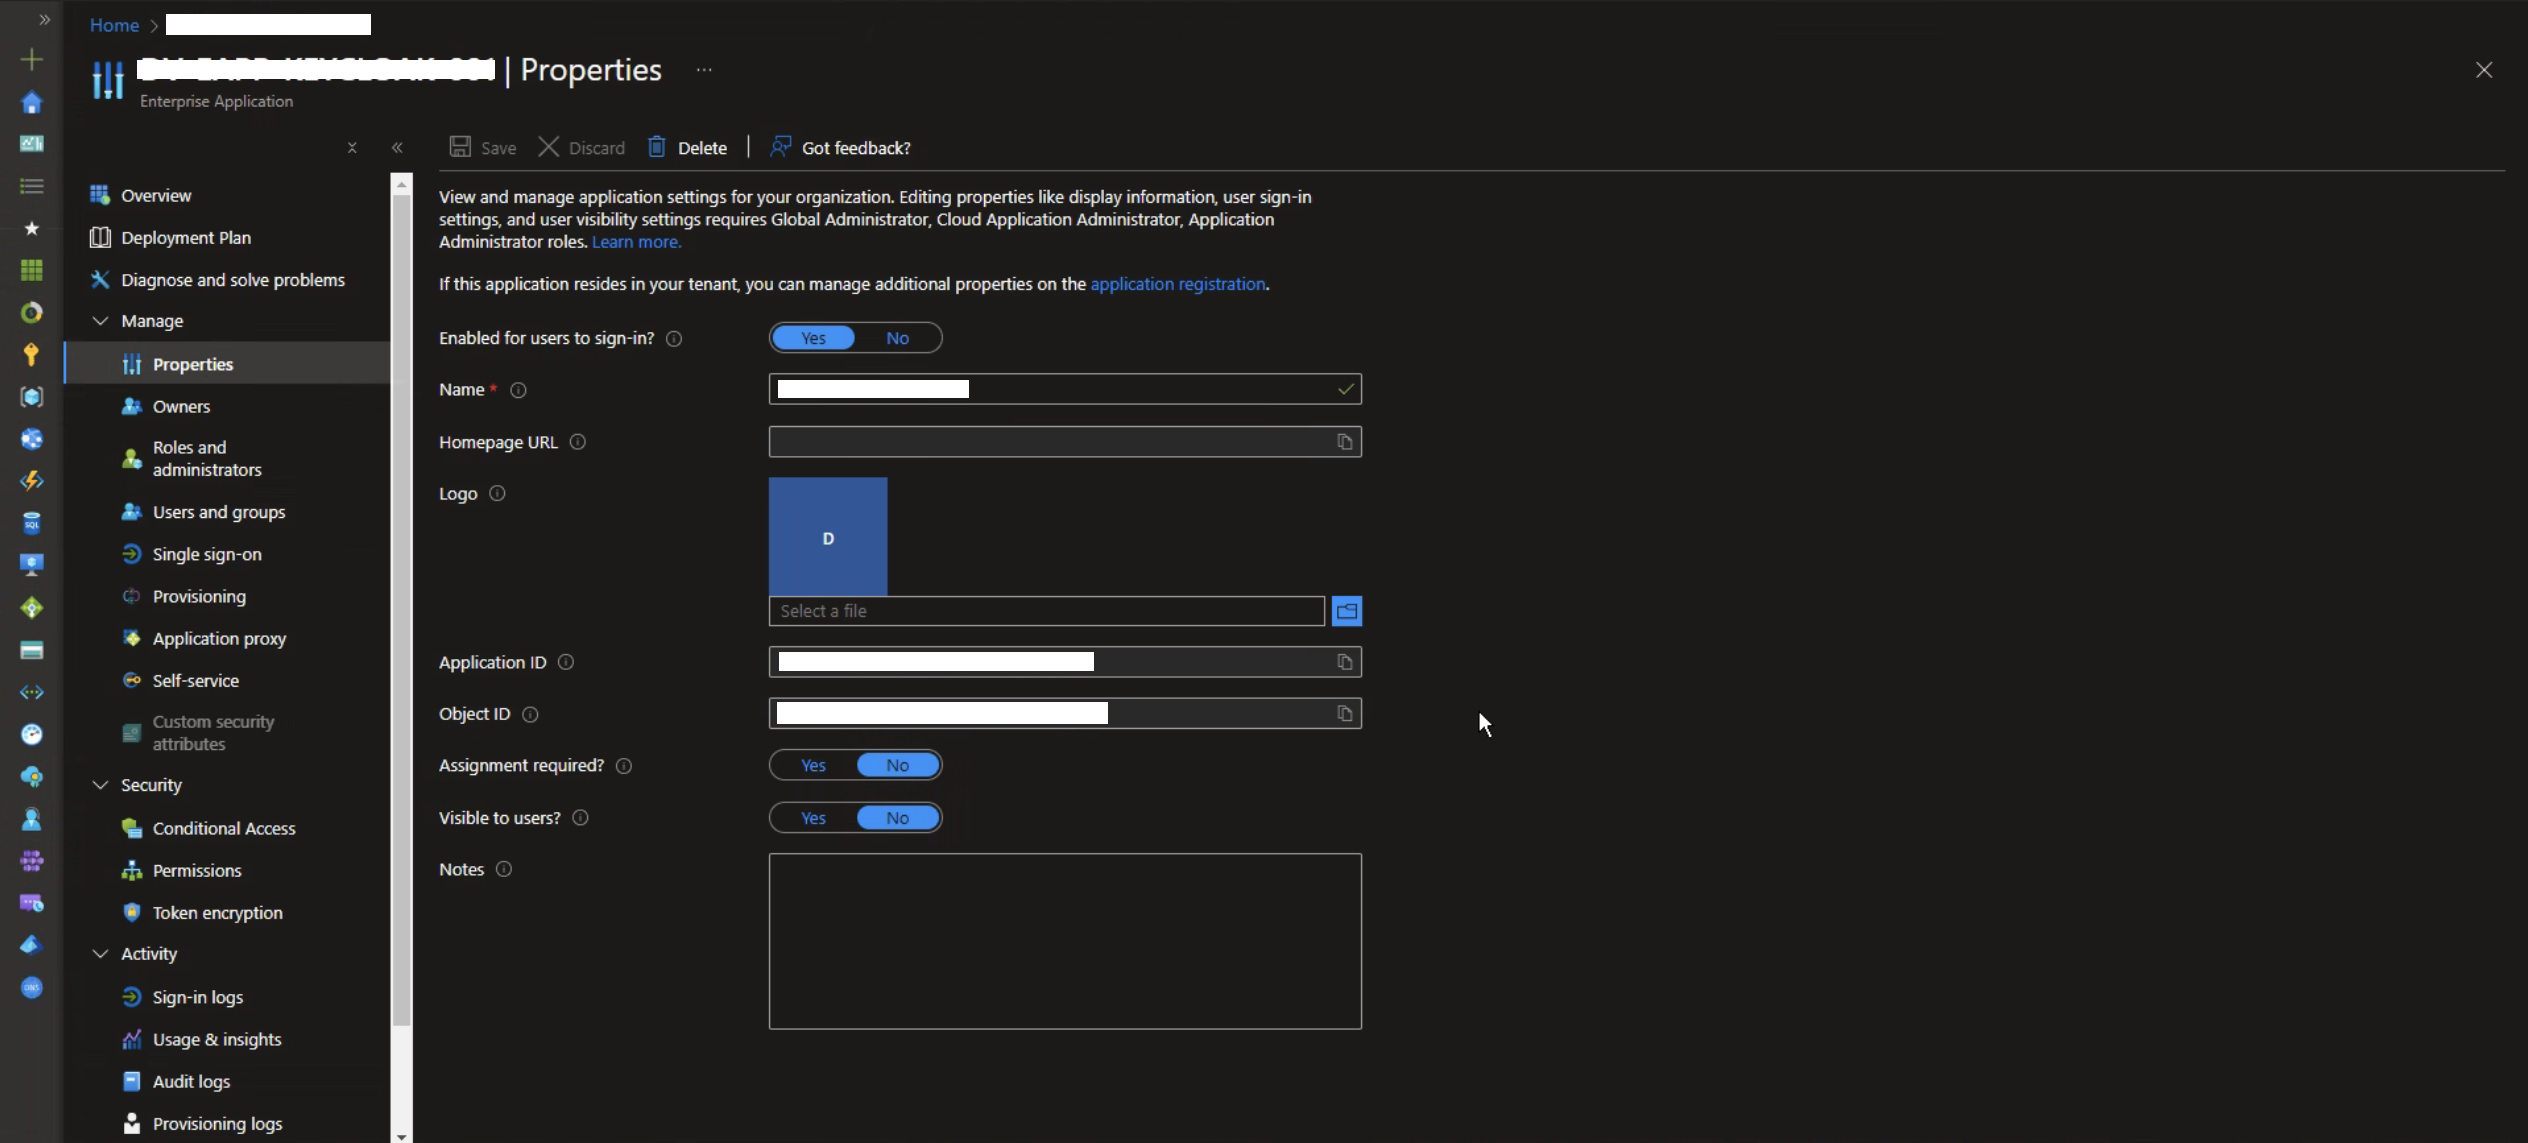
Once you have created a new App Registration, go to the "Properties" section where you will find the Client ID. You will need this information later for the Nebula configuration.
Step 3: Configure Tokens for SSO
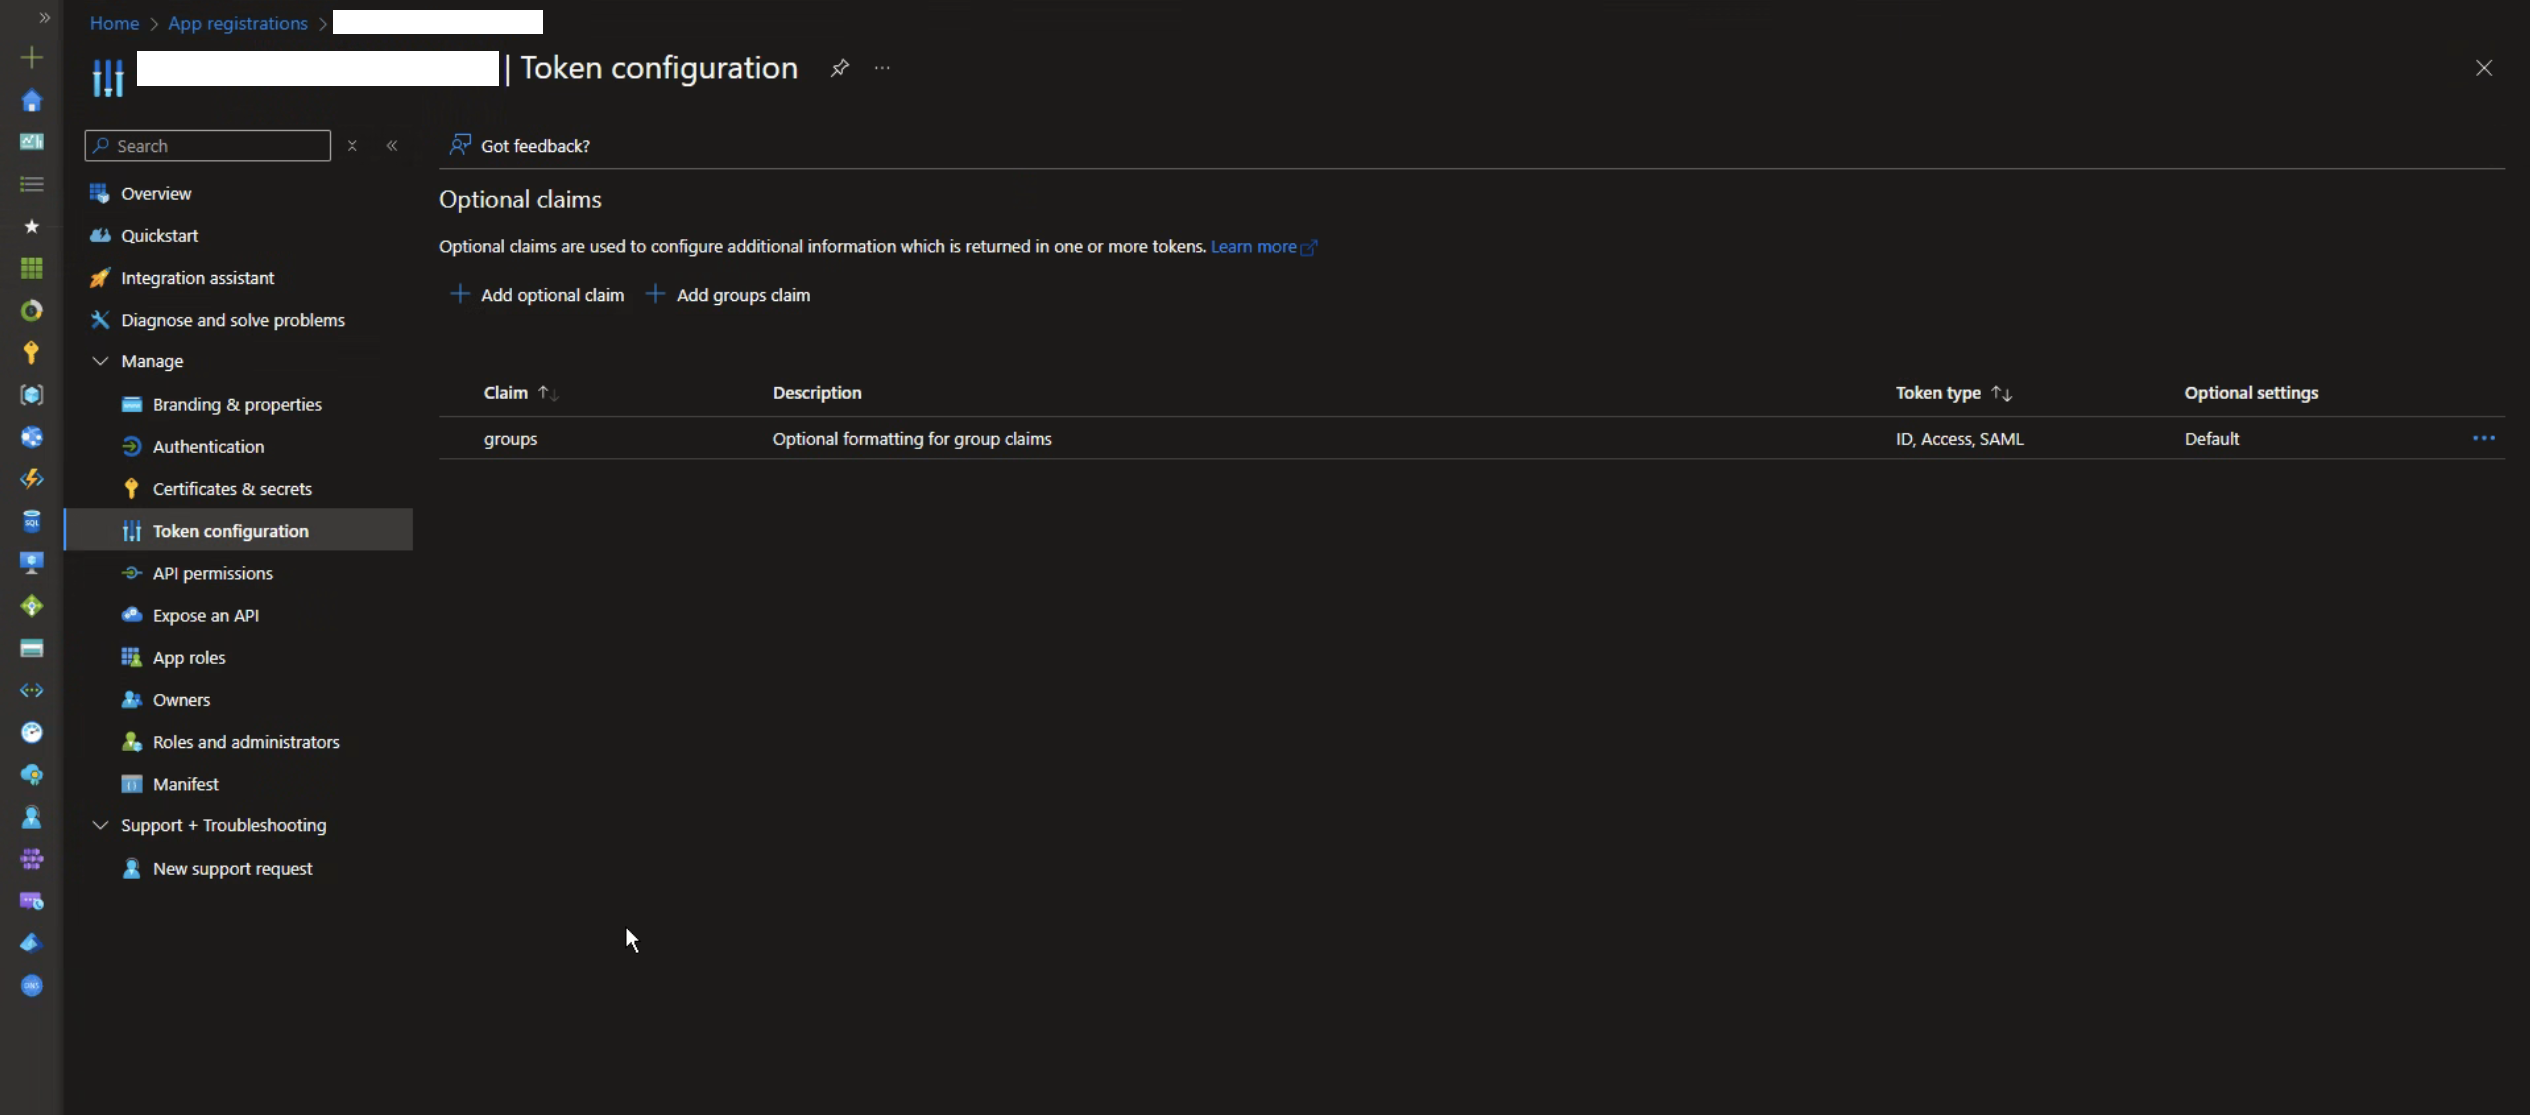
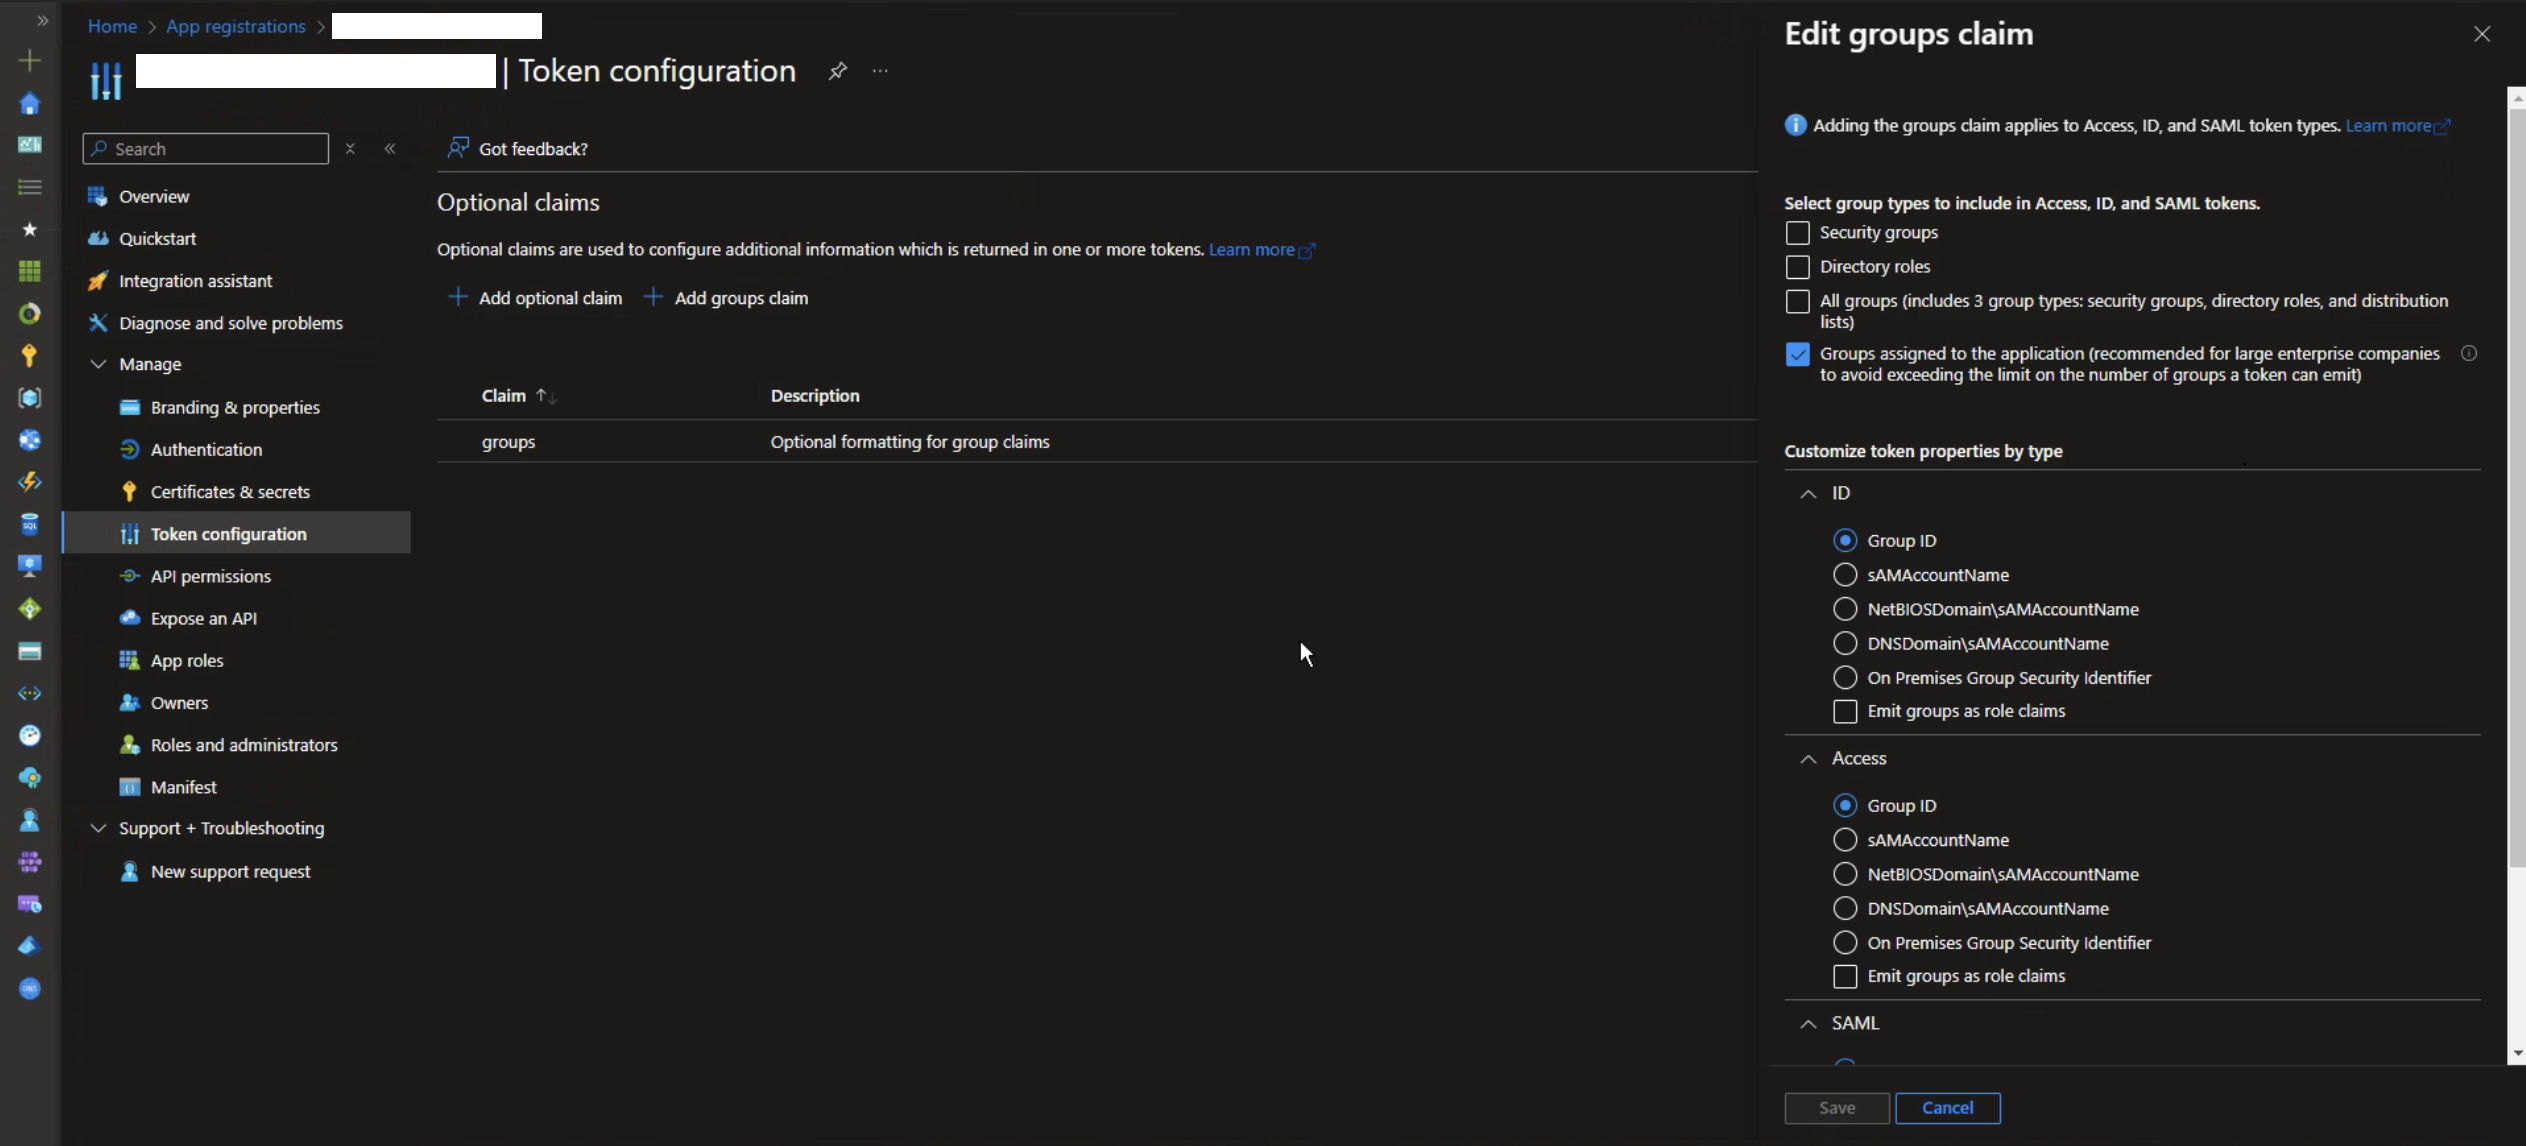
Go to the Token Configuration section:
- In the left sidebar, select Token configuration.
- Add the claim for groups.
- Click on "Add groups claim".
- Select "Groups assigned to the application" (recommended for large organizations).
- Under "Customize token properties by type", select Group ID under ID and Access.
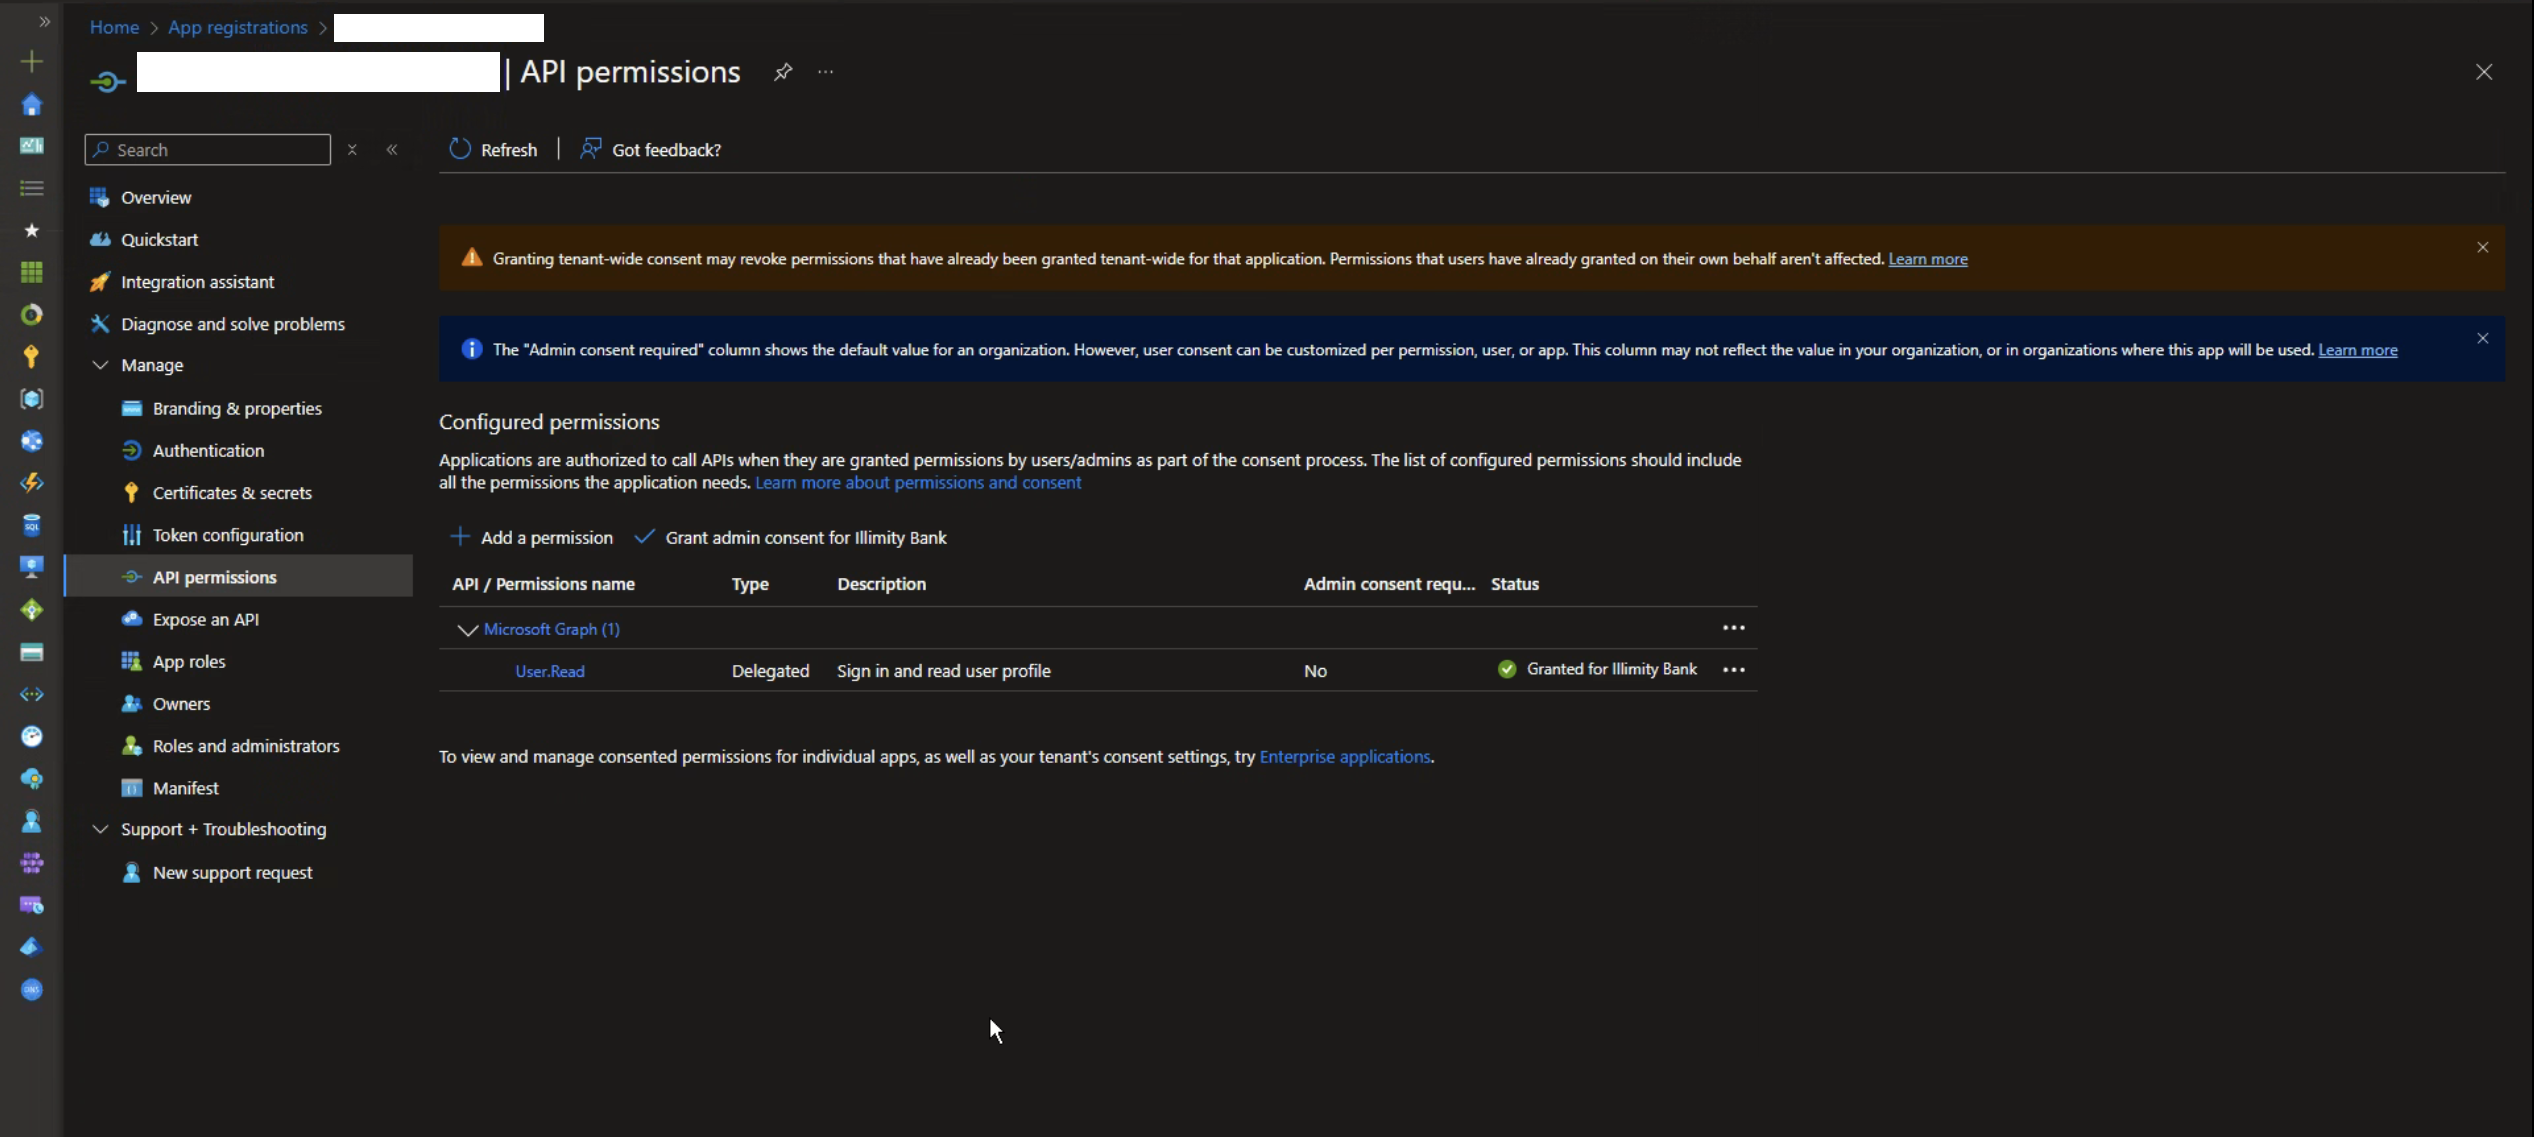
Step 4: API Permissions Configuration
- In the left panel, under the "Manage" section, click on "API permissions". You will see a section called "Configured permissions" with the existing permissions.
- Add New API Permissions
- Click on "+ Add a permission".
- Select the type of API (e.g., Microsoft Graph).
- Choose between:
- Delegated permissions: for access on behalf of a user.
- Application permissions: for direct access from an app without user interaction.
- Select the necessary permissions (e.g., User.Read to read the user profile).
- Click on "Add permissions" to confirm.
- Grant Admin Consent
After adding the permissions, click on "Grant admin consent for [Organization Name]" (e.g., Illimity Bank). Confirm the action in the pop-up window.
- Verify Permissions
Ensure that the permission status shows "Granted for [Organization]" with a green checkmark icon.
- Advanced Management (Optional)
To manage permissions granted at the individual application level:
- Click on "Enterprise applications" at the bottom of the API permissions section.
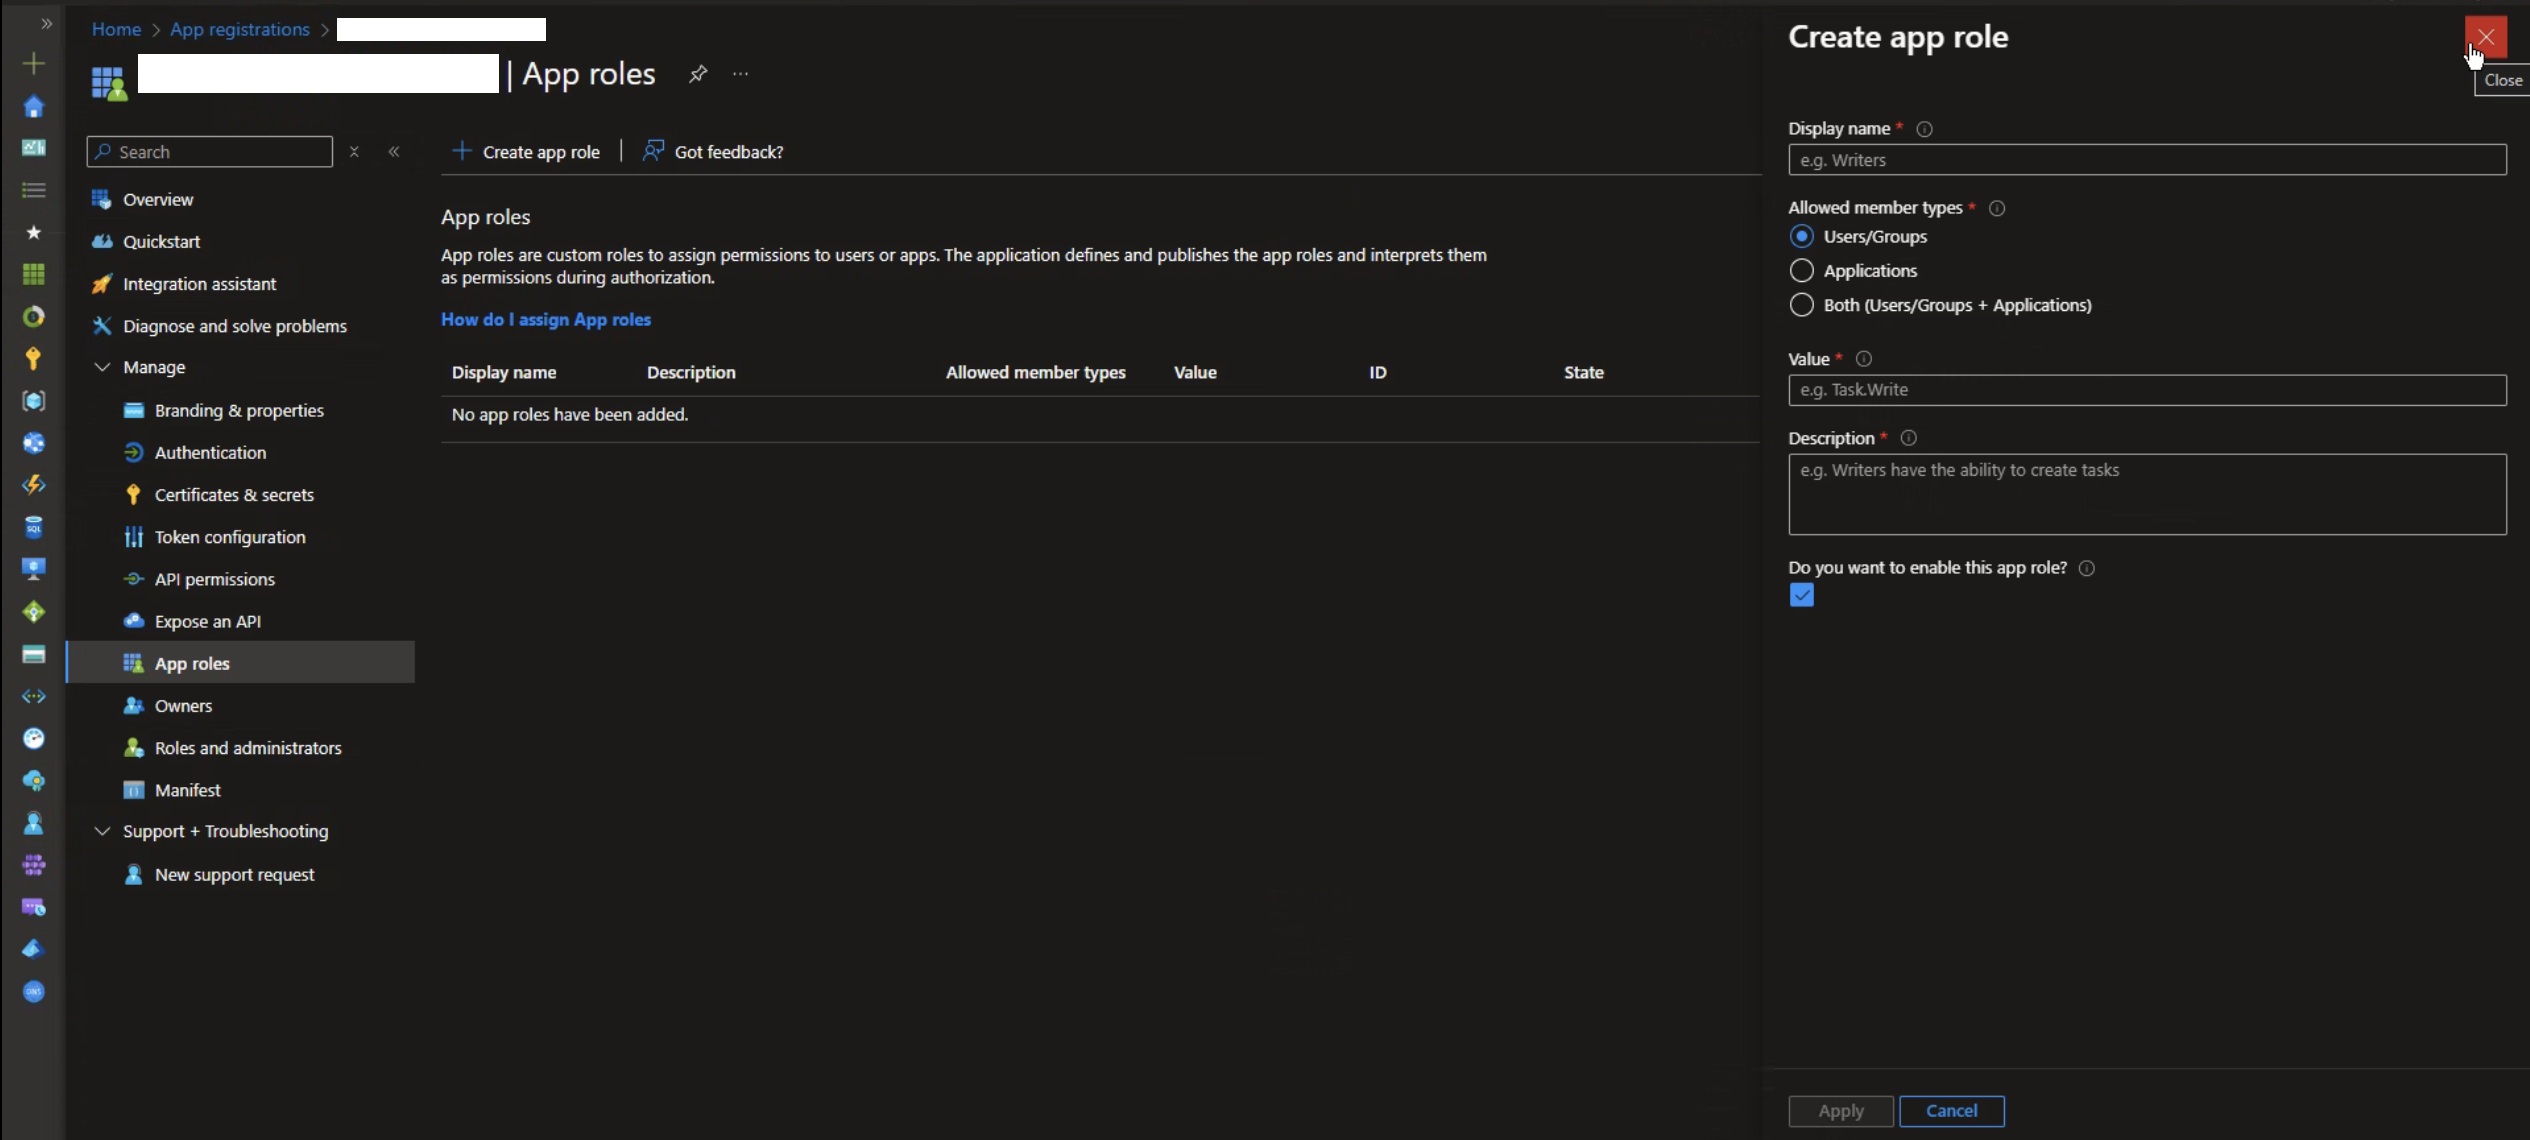
Step 5: App Roles
In the left panel, under the "Manage" section, click on "App Roles".
Click on "Create App Roles" and select "Users/Groups" as shown in the image below:
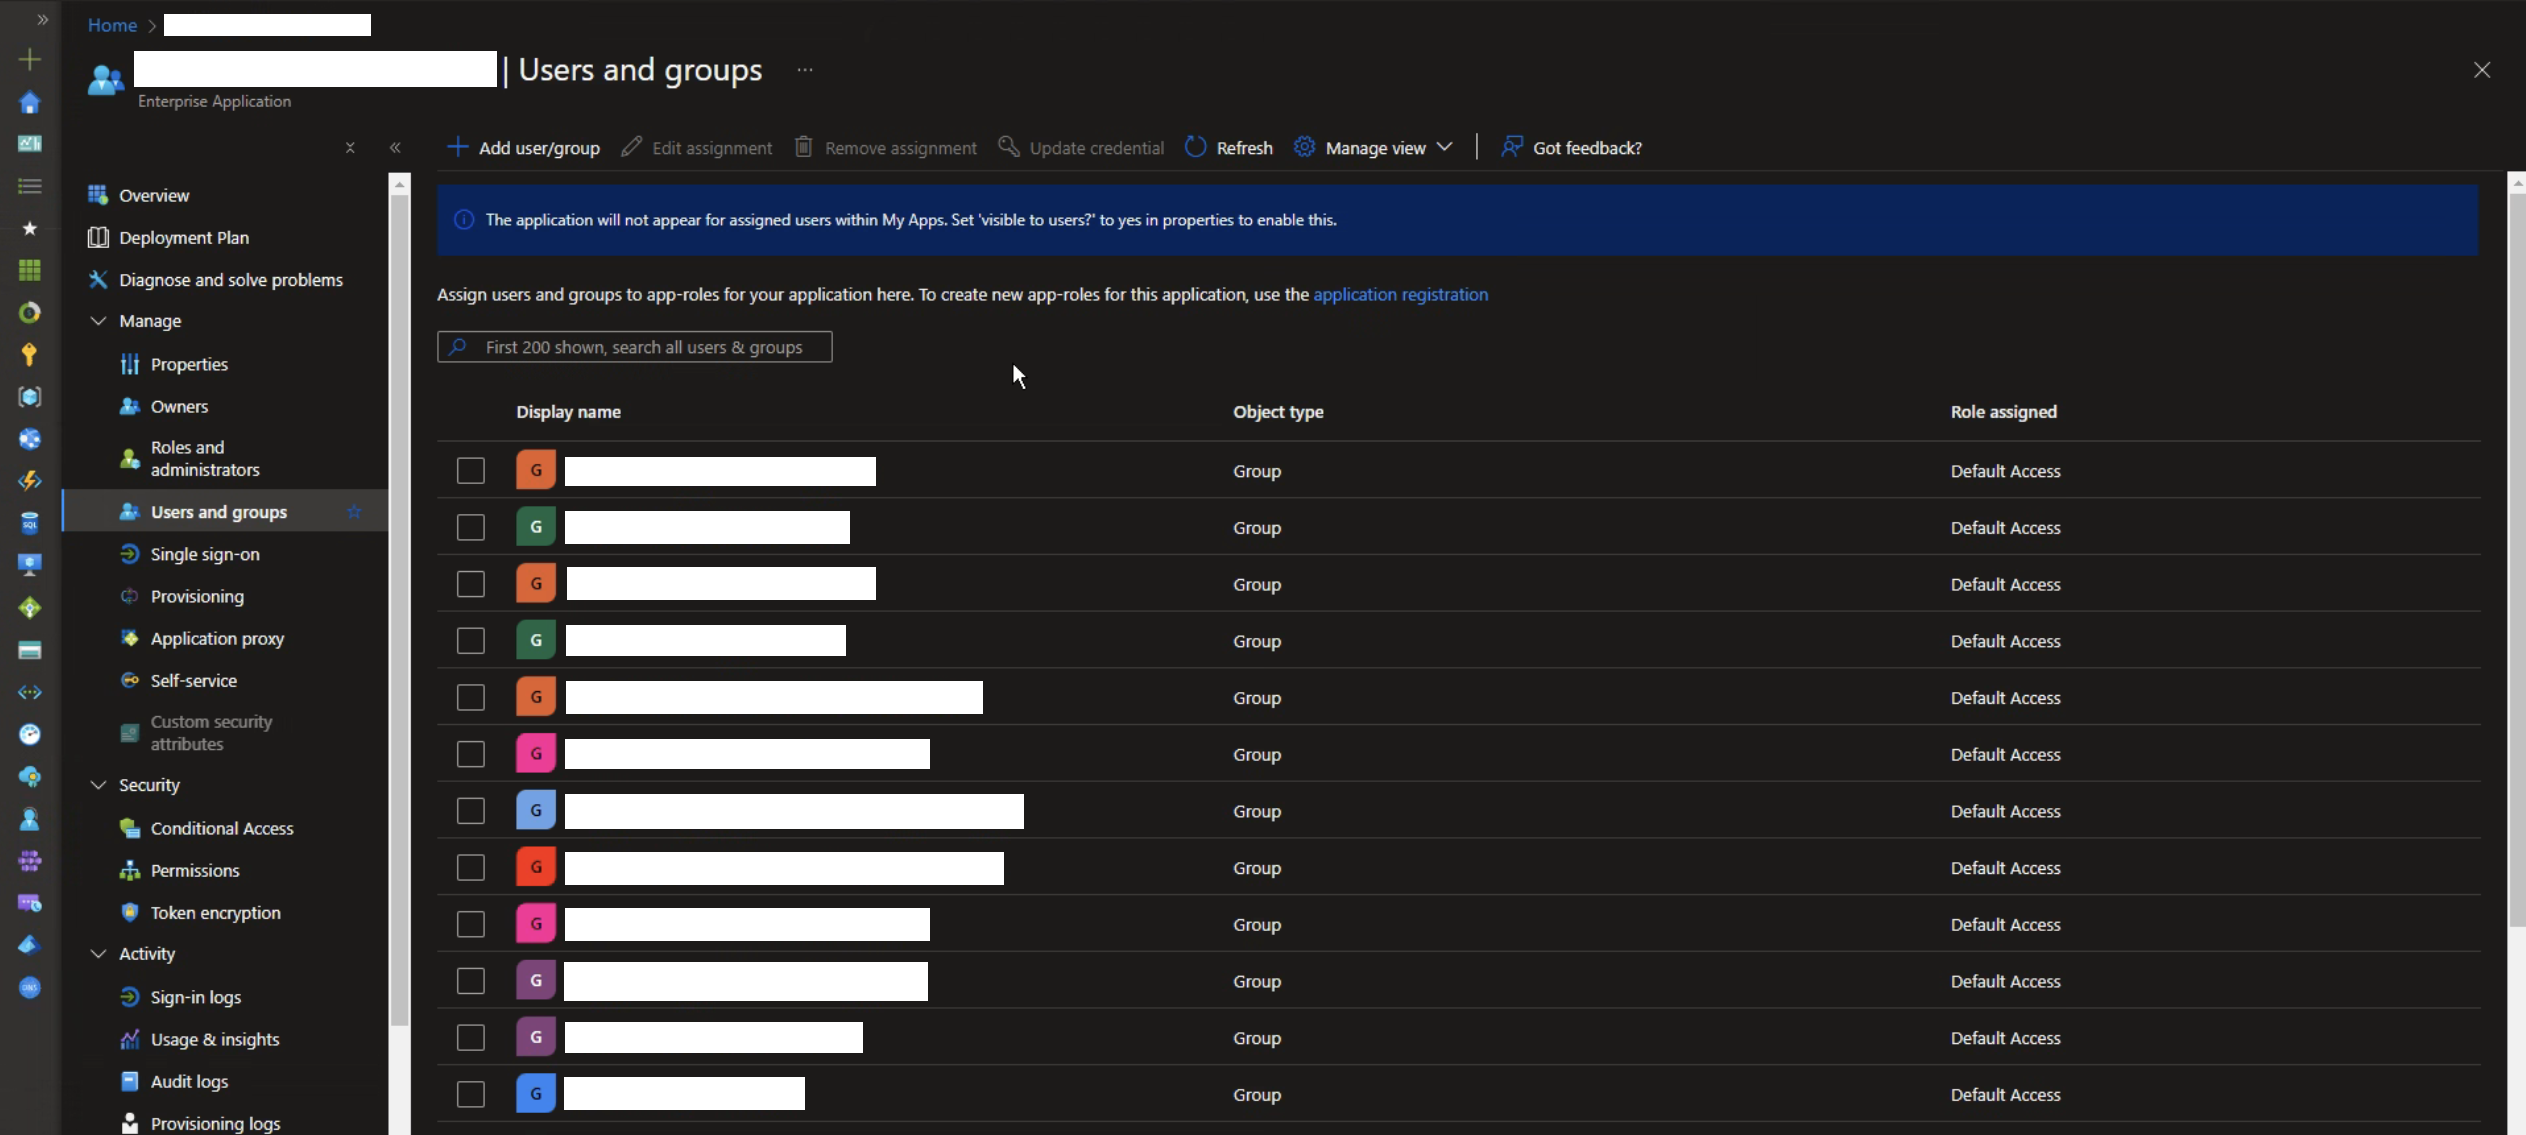
Step 6: Users & Groups
In the left panel, under the "Manage" section, click on "Users & Groups".
Add all the user groups you want to enable for Single Sign-On here.
Step 7: Client Secret
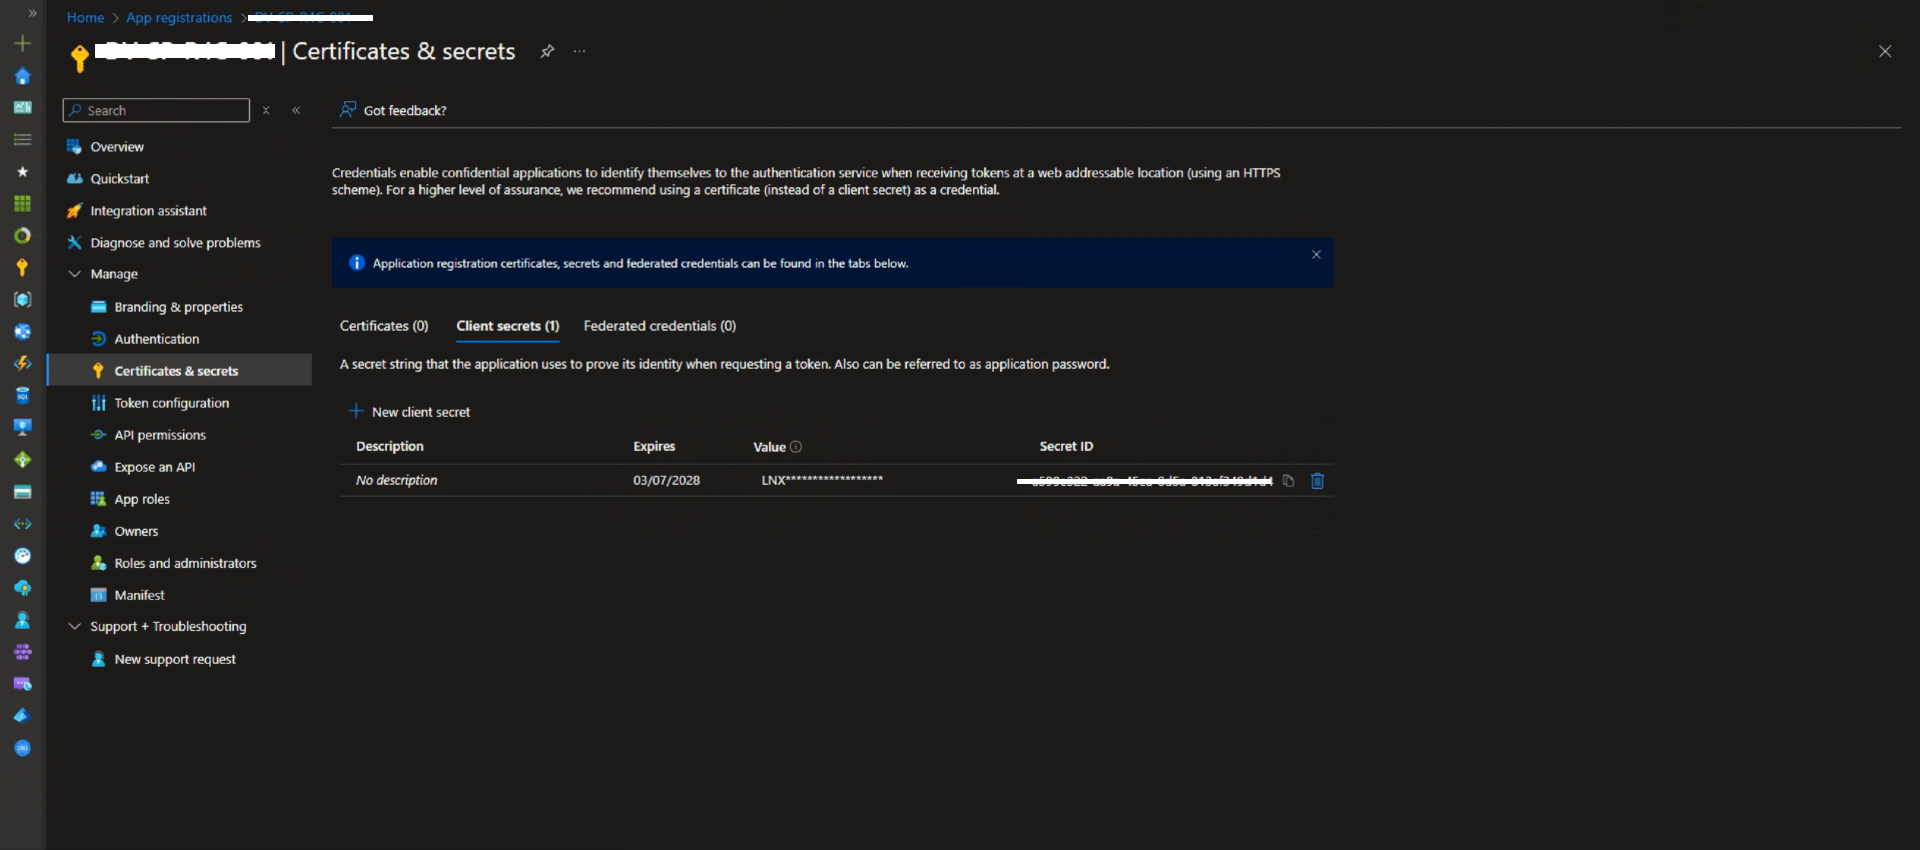
In the left panel, under the "Manage" section, click on "Certificates & secrets".
- Under Client secrets, click + New client secret.
- Enter a description and select an expiration period.
- Click Add, then copy and store the generated Value securely.
Step 8: Nebula Steps
Now it's time to set up SSO on Nebula. Follow these steps.
Step 9: Set the Redirect URL in Azure Portal
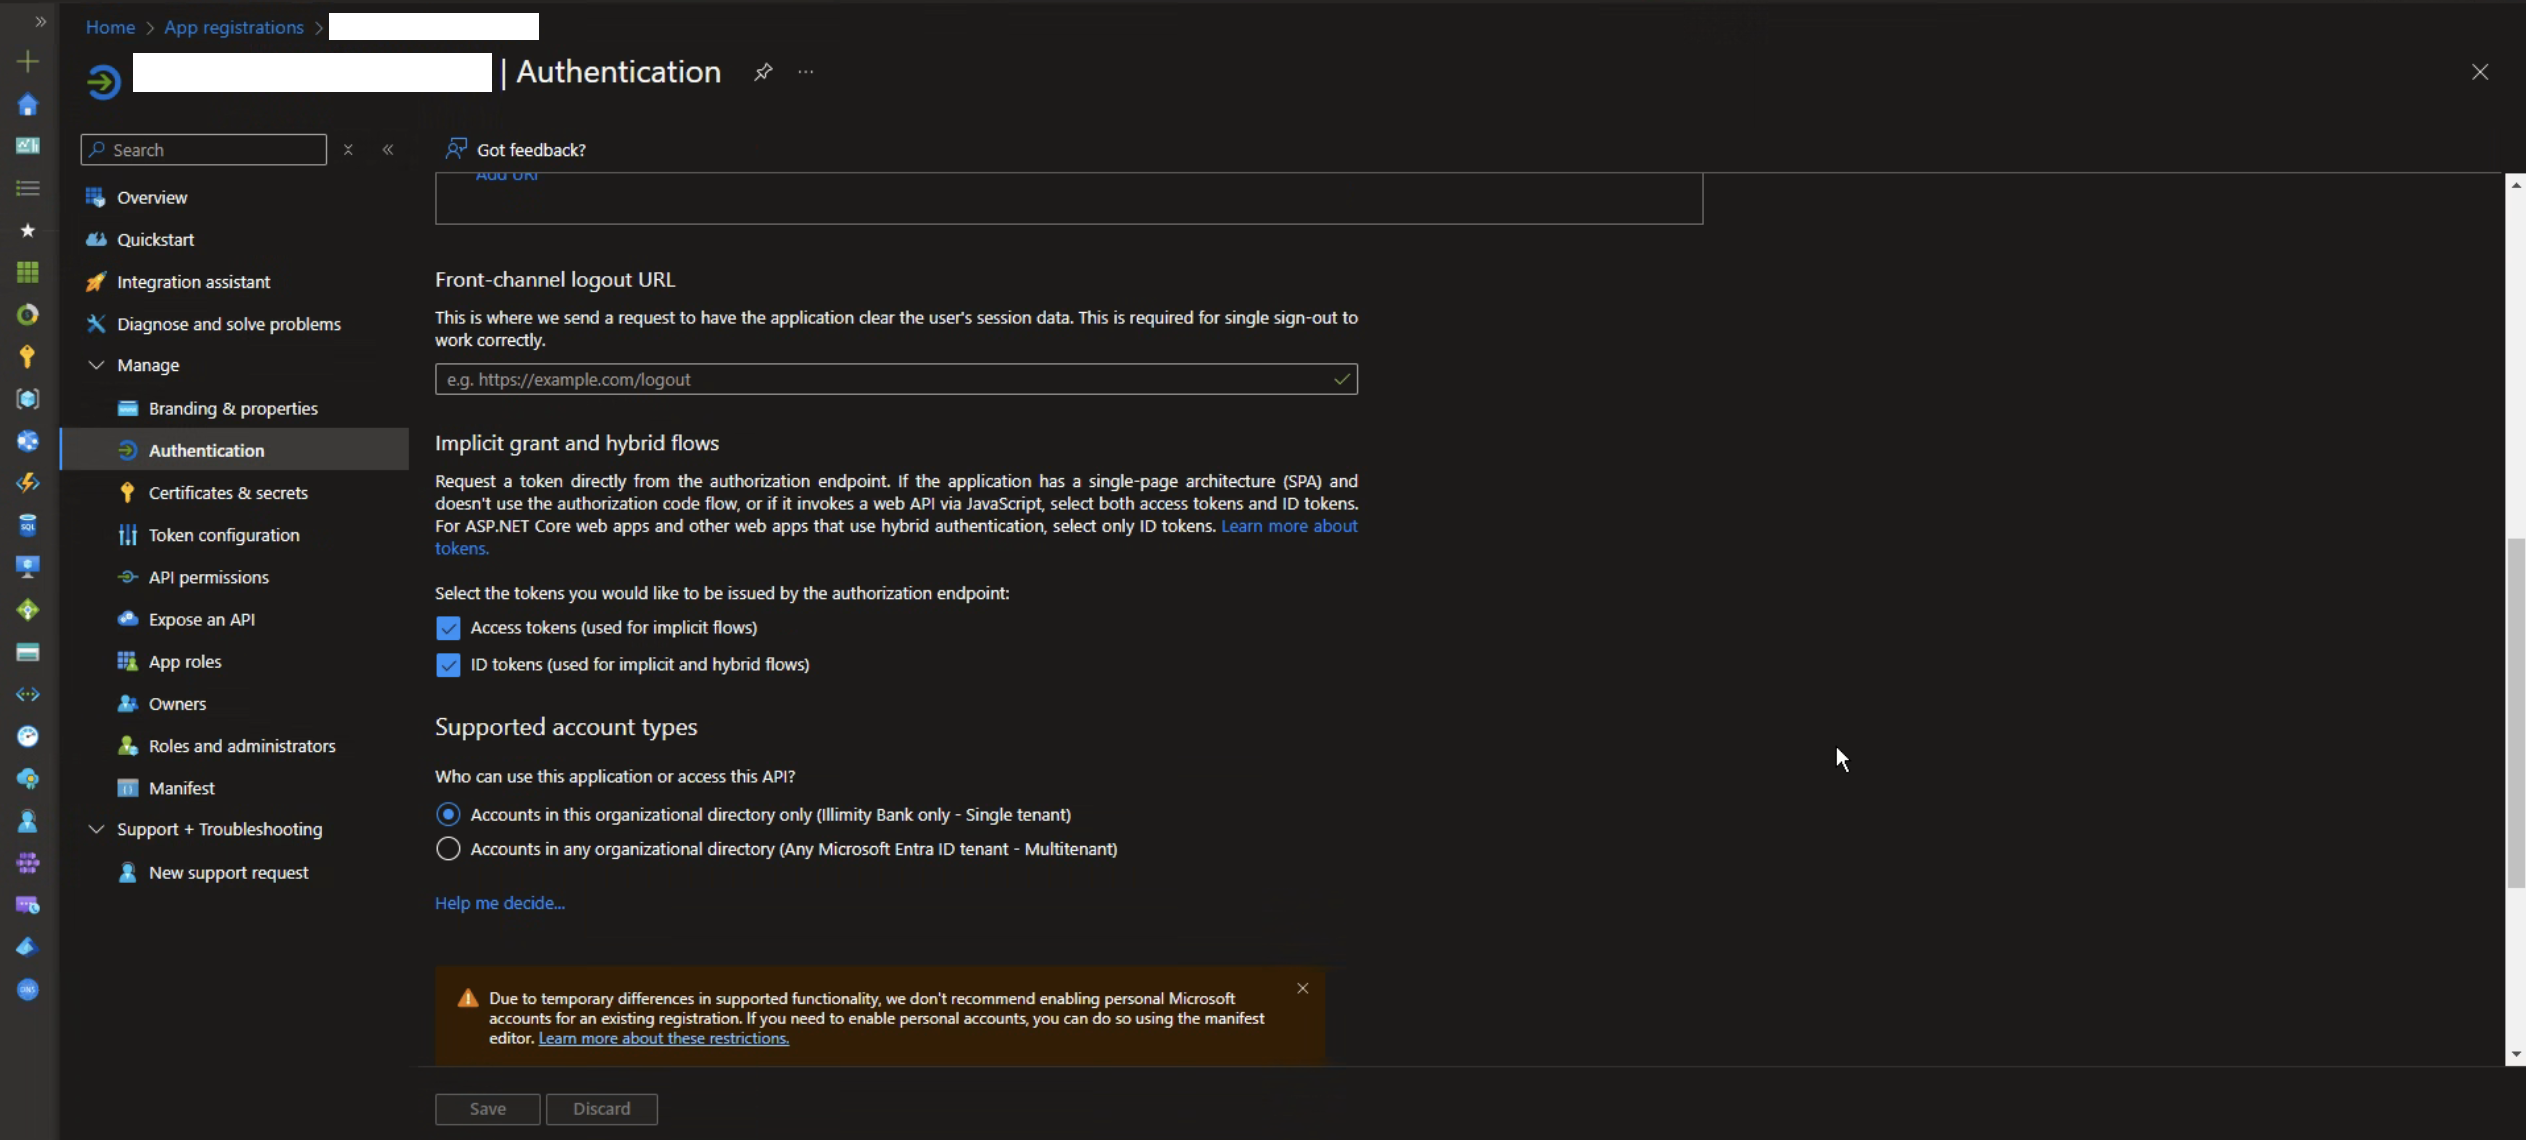
In the left panel, under the "Manage" section, click on "Authentication".
Then, copy the Redirect URL from Nebula and add it under Web / Redirect URIs:

The final step is to configure the 'Implicit grant and hybrid flows' settings. Refer to the image below for guidance.